Homemade Roman-style “direct dough” pan pizza recipe

4

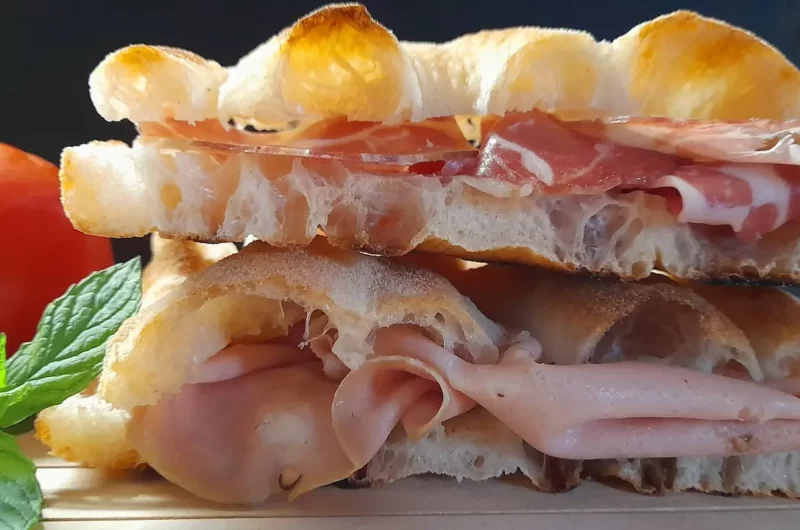
Roman-style pan pizza is a delicious and popular variation of traditional pizza. Characterized by a soft and slightly crunchy base, this pizza stands out for its rectangular shape and for being cooked in a pan.

Its preparation begins with direct kneading, which means that the dough is worked directly without a long leavening period. This method makes it possible to obtain a pizza that is quicker to prepare, ideal for satisfying the desire for a tasty pizza in a short time.

The dough for Roman pan pizza is usually made with flour, water, fresh brewer’s yeast, salt and extra virgin olive oil. The dough is spread in the pan, which can be rectangular or square, and left to rise for a short period of time.

Once the dough has been rolled out, the pizza is topped with peeled tomatoes or tomato puree, buffalo mozzarella or fior di latte, and herbs such as salt, pepper and oregano. Some also add other ingredients such as olives, capers or anchovies to further customize the flavor of the pizza.

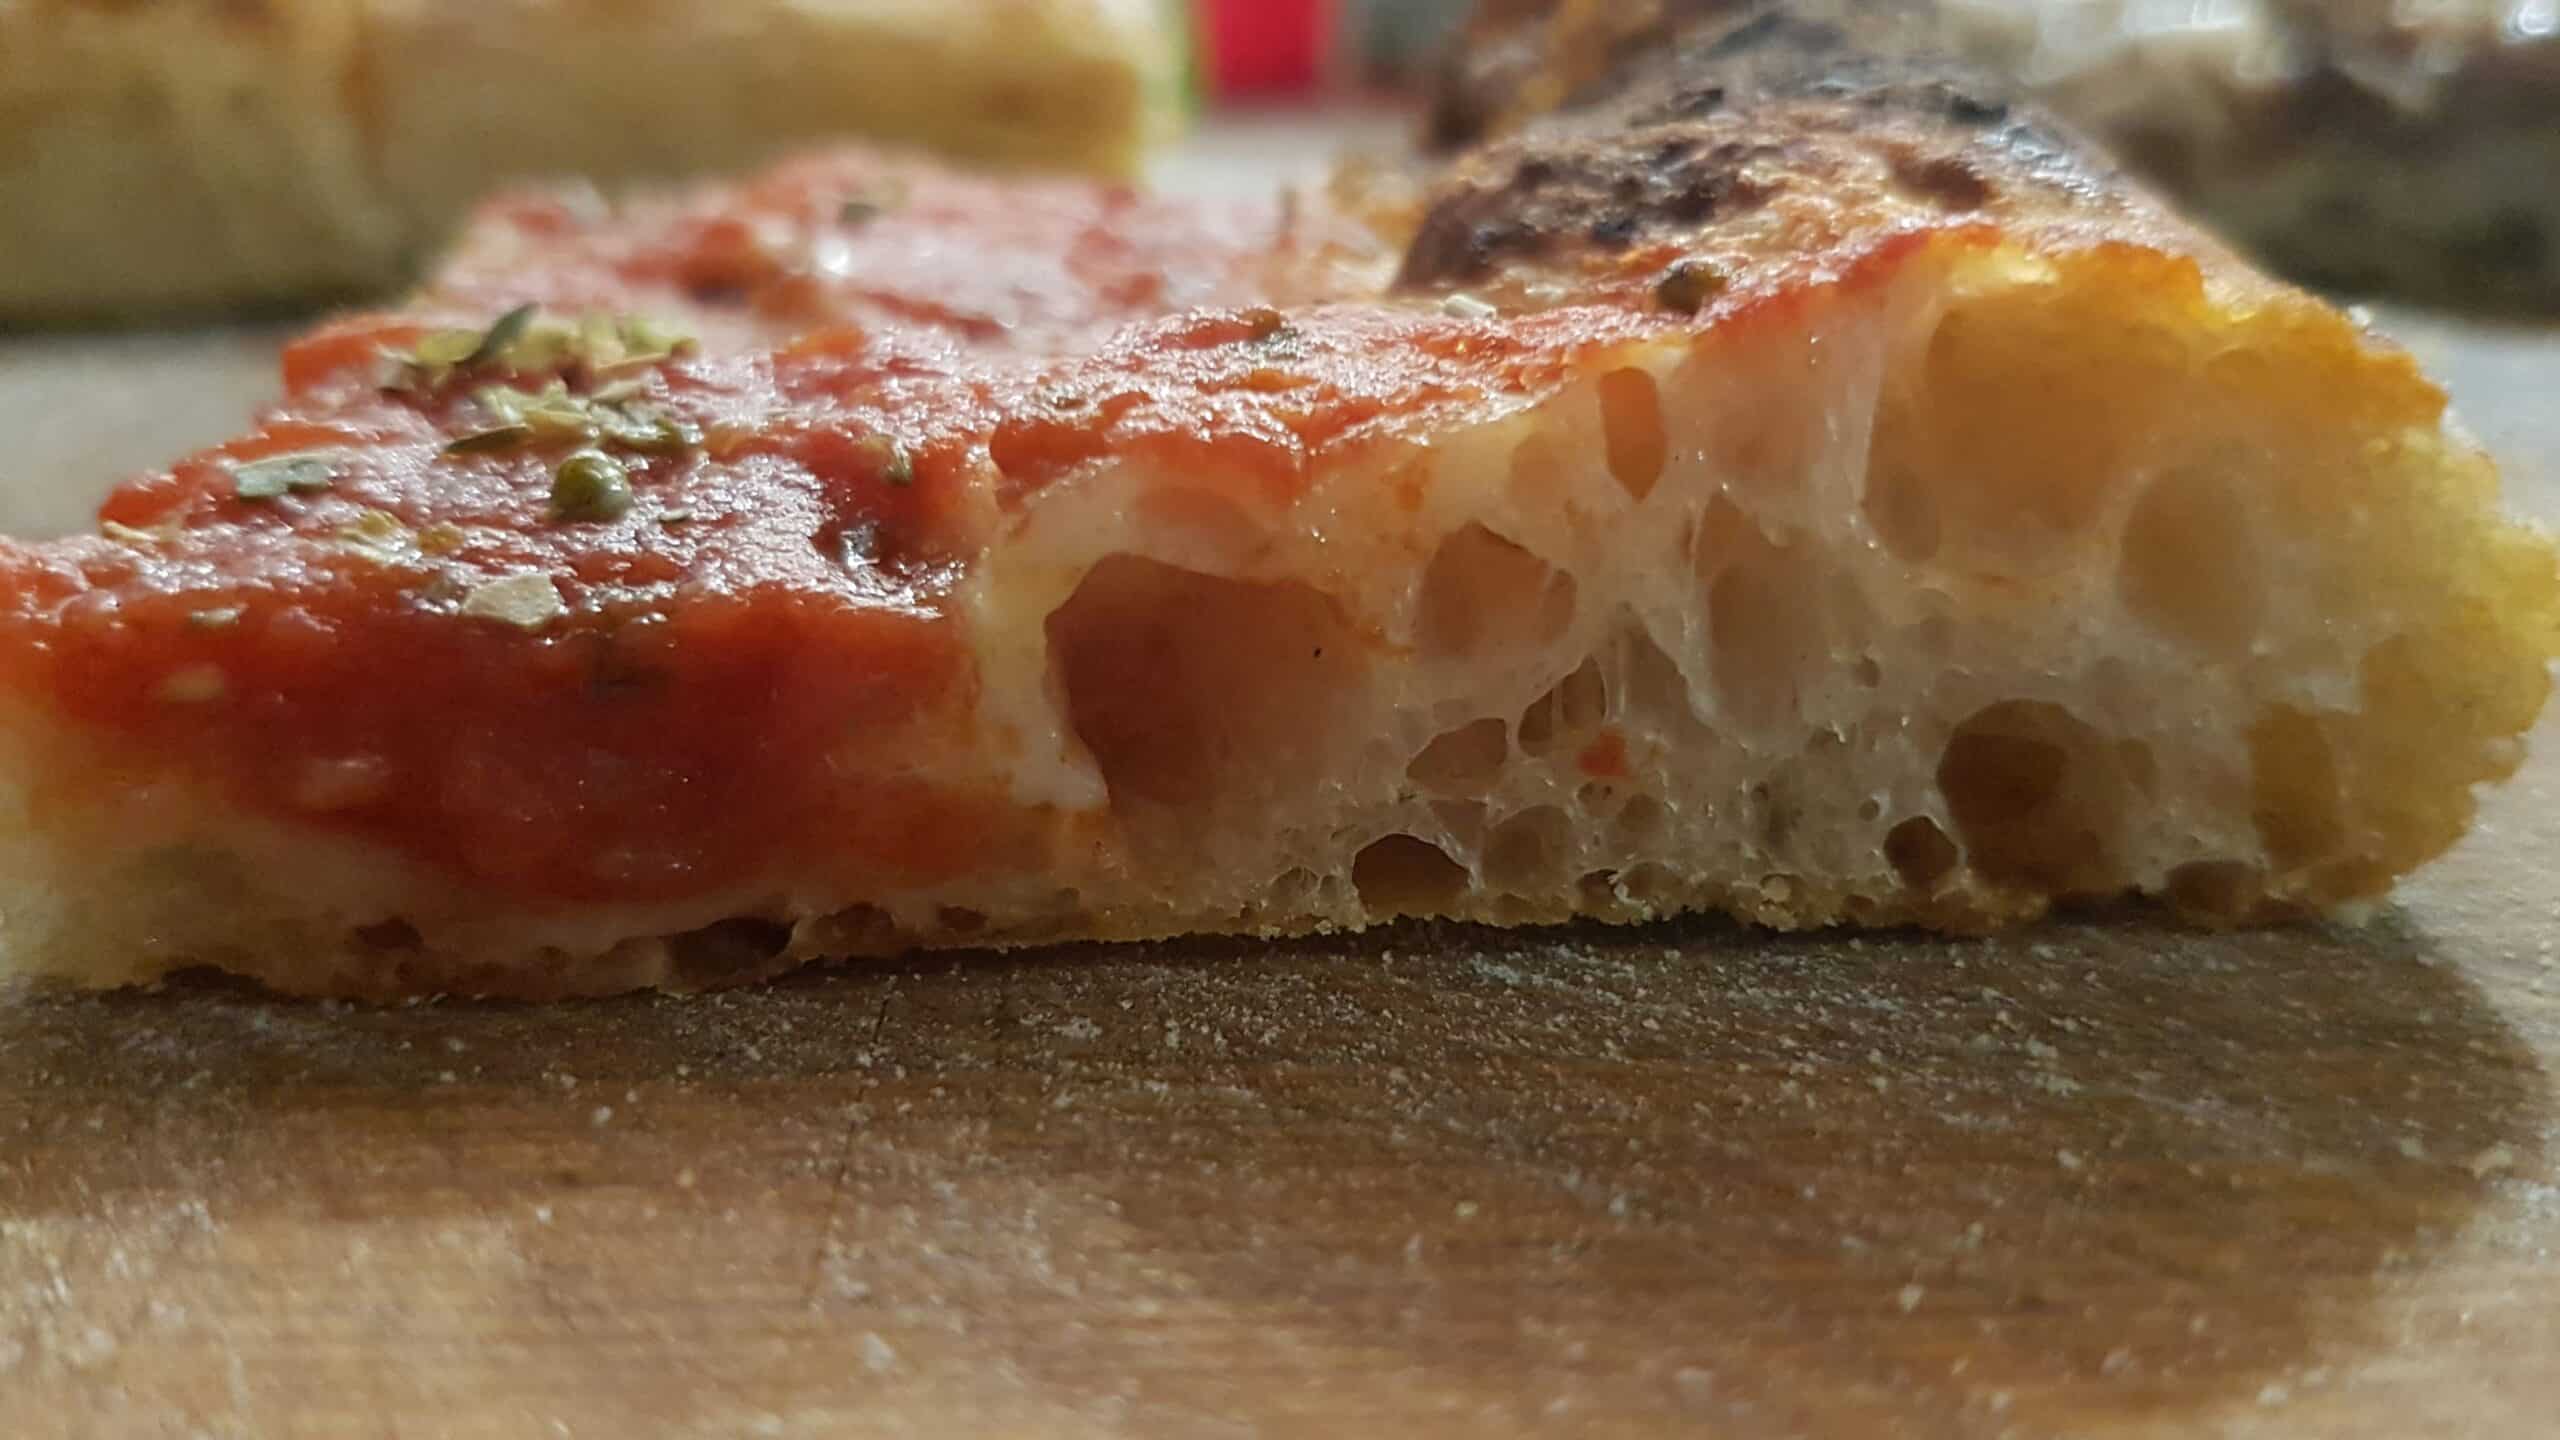
The Roman pan pizza is then cooked in the oven at a high temperature until the surface is golden and crunchy. The result is a pizza with a soft and slightly honeycombed base, perfectly combined with the toppings that enrich its flavour.

Roman pan pizza is an authentic Italian specialty, appreciated for its simplicity and goodness. It’s a great alternative to traditional pizza and a treat to savor with friends and family. Experiment with different combinations of toppings and let yourself be conquered by the goodness of this unique pizza variation.

If you like our recipes and if you like, follow us on our FACEBOOK PAGE, INSTAGRAM, to stay up to date on recipes and news!

Here is a recipe for preparing a delicious Roman pan pizza with direct dough:

Homemade Roman-style “direct dough” pan pizza recipe

Recipe by Massimo
5.0 from 1 vote
Course: PizzaCuisine: ItalianDifficulty: pizza in teglia alla romana
Serving

4

Trays
Preparation Time

30

minutes
Cooking Time

7

minutes
Calories

218

kcal
First leavening Fridge

24

hours
Second leavening (stark)

4

hours
Total Time

37

minutes

To make 4 40×15 trays or 2 40×30 trays

Ingredienti

  • 680 gr Bread Flour

  • 540 gr Water

  • 4 gr Fresh brewer’s yeast

  • 14 gr Salt

  • 14 gr Extra virgin olive oil

Preparazione

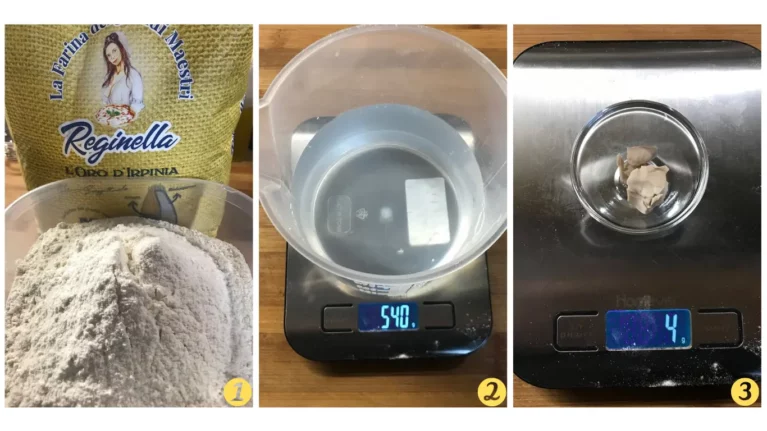
  • To prepare the Roman-style pizza in a pan, weigh 1) 680 g of type 0 flour, 2) 540 g of water, 3) 4 g of fresh brewer’s yeast or 1 gram of dry yeast in a bowl.01 PIZZA IN TEGLIA ALLA ROMANA
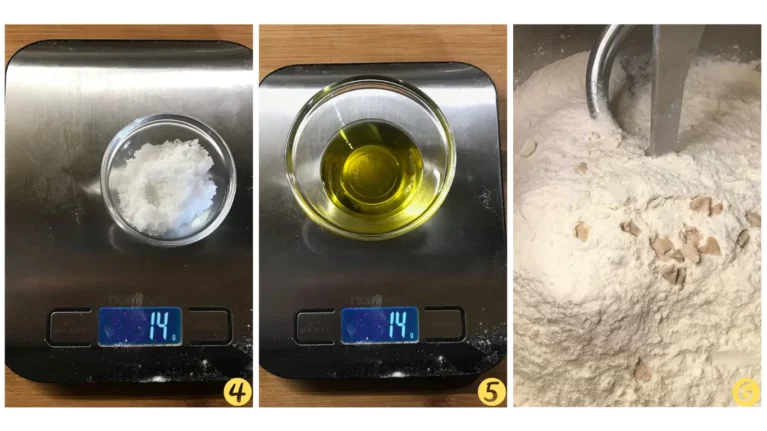
  • 4) weigh 14 g of salt, 5) 14 g of extra virgin olive oil. 6) Insert the flour and yeast ingredients into the mixer or into the spiral mixer.02 PIZZA IN TEGLIA ALLA ROMANA
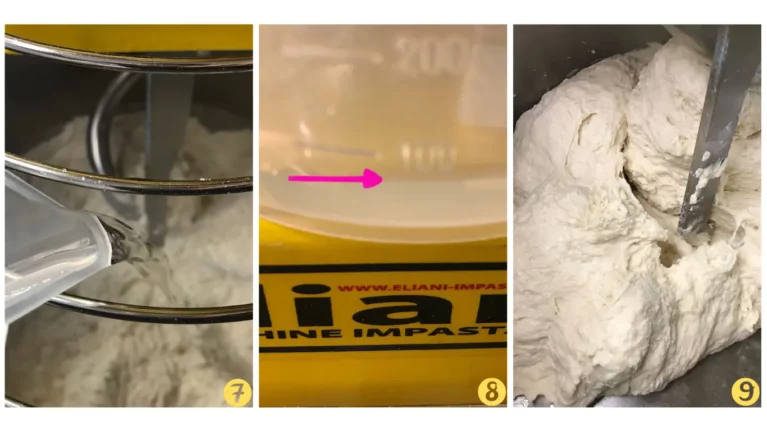
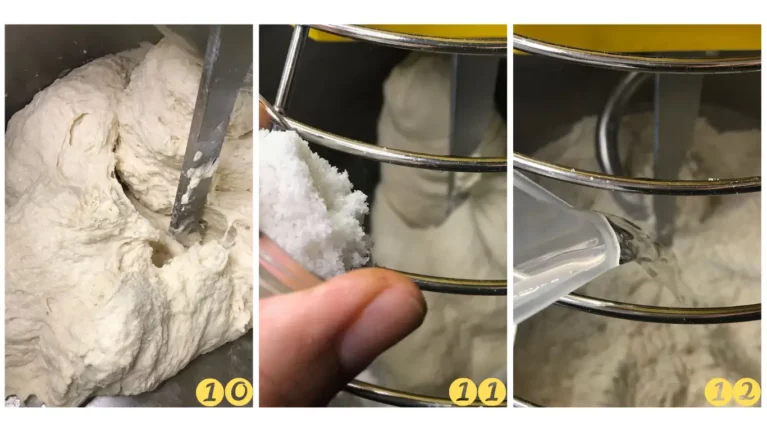
  • 7) Insert almost all the water 8) leaving us less than 100 gr which we will need later. 9) Let’s increase the speed of the planetary mixer or the spiral and bring it to string the dough.003 PIZZA IN TEGLIA ALLA ROMANA
  • 10) When the dough begins to string together and detaches from the walls of the planetary mixer or spiral 11) add the salt and 12) add the water a little at a time until it is finished.04 PIZZA IN TEGLIA ALLA ROMANA
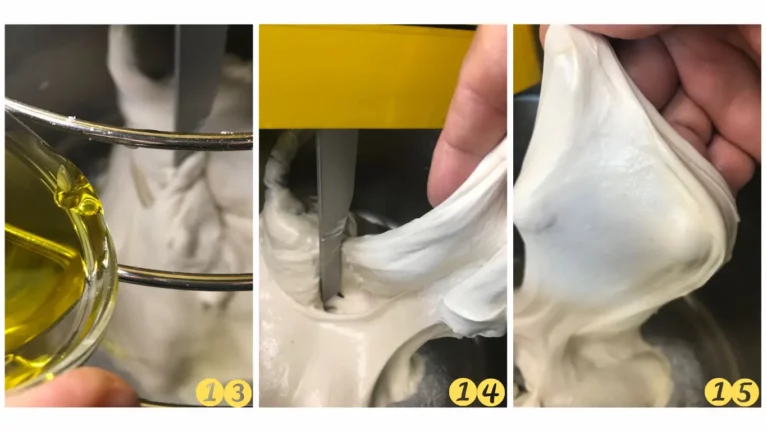
  • After pouring the water, increase the speed of the planetary mixer or the spiral and start adding 13) the oil in 2 times and bring the dough to 14/15) string (for the planetary mixer it must be detached from the walls)05 PIZZA IN TEGLIA ALLA ROMANA
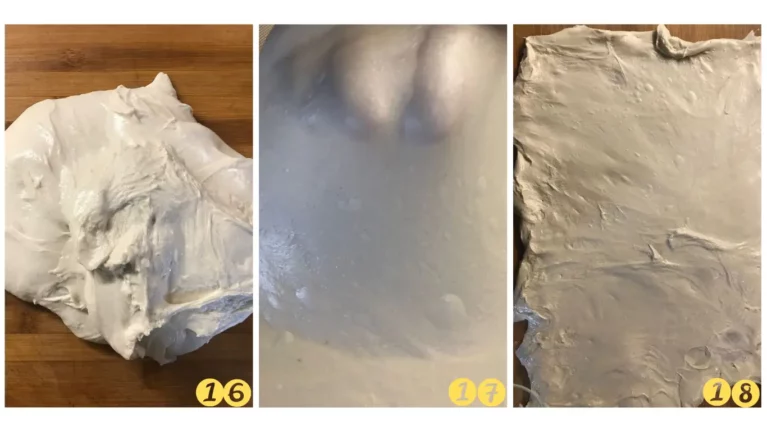
  • Once our dough has been strung 16) we transfer it onto a pastry board to pass 18) to lamination, this is used to better activate the yeast and bring the dough to a lower temperature.06 PIZZA IN TEGLIA ALLA ROMANA
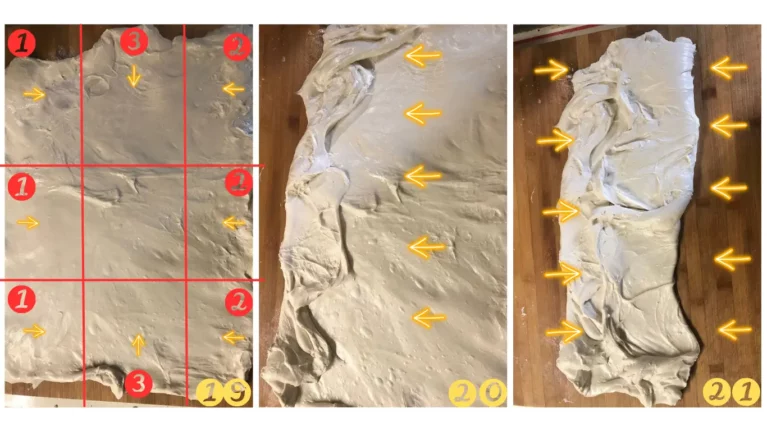
  • I state that I’m not playing tic-tac-toe but it serves to explain how we have to close the dough, in figure 19 I have drawn lines for how to divide the dough, 20) the side marked with 1 also goes towards the center 21) side 2 we bring it towards one hundred as the picture.07 PIZZA IN TEGLIA ALLA ROMANA
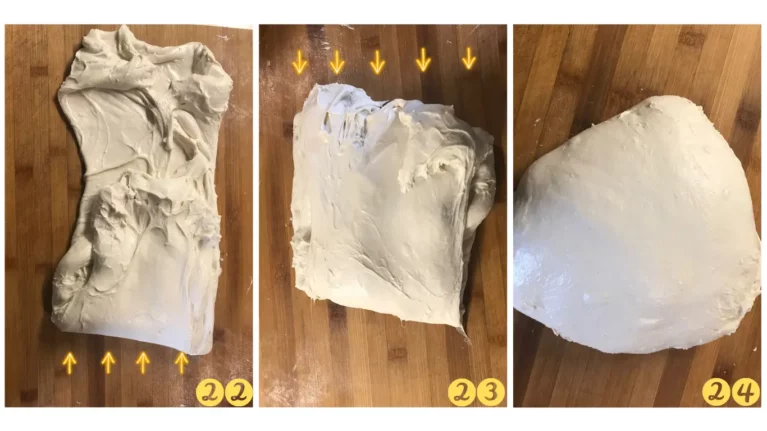
  • Now 22) take the underside of number 3 and bring it to the centre, 23) bring the upper side to the centre, 24) at this point we make a round of folds giving it a loaf shape.08 PIZZA IN TEGLIA ALLA ROMANA
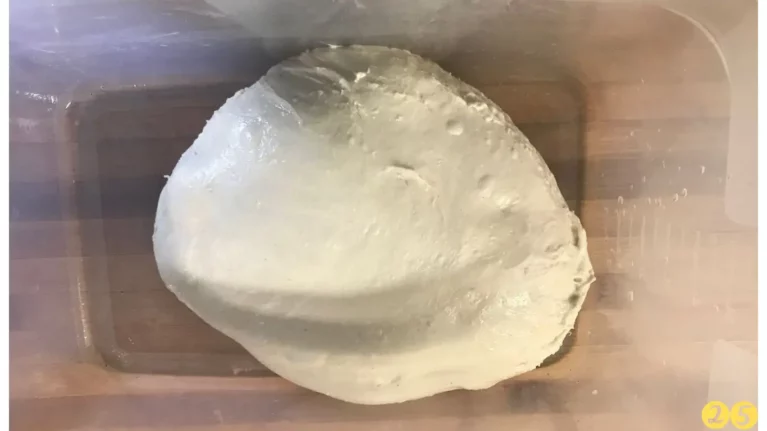
  • 25) At this point we grease the stick of oil and put it in a closed container to rest for 1 hour (it’s called stake)09 PIZZA IN TEGLIA ALLA ROMANA
  • LET’S MAKE LOTS (SAGLIO)
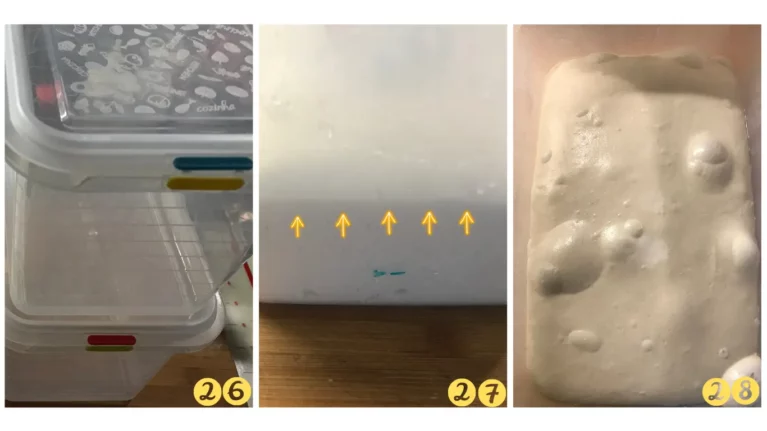
  • 26) Let’s prepare the containers where the loaves will be placed to make the last leavening (Appretto). 27) After 24 hours of maturation in the refrigerator at 4 degrees we have our dough increased in volume, 28) the dough must look like this.10 PIZZA IN TEGLIA ALLA ROMANA
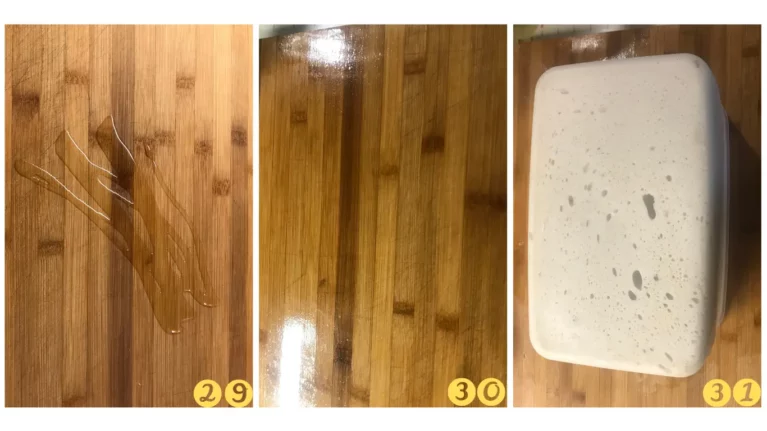
  • 29) We put a little oil on the chopping board to prevent the dough from sticking, 30) with the hand we try to create a homogeneous oiled surface, 31) we turn the container upside down and let the dough fall without forcing it.11 PIZZA IN TEGLIA ALLA ROMANA
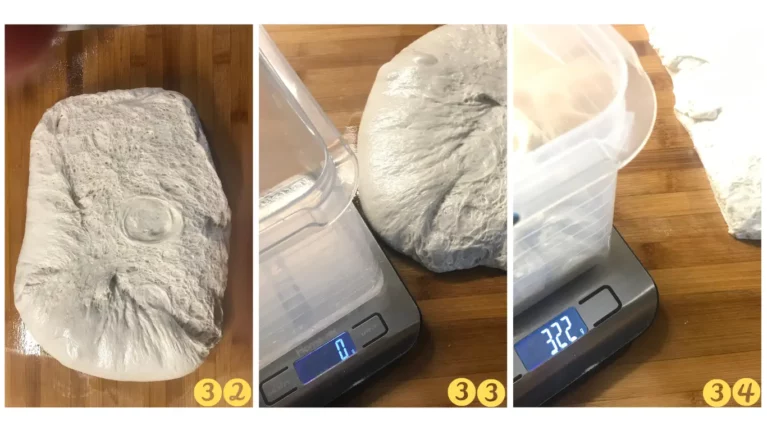
  • 32) Now with the dough on the cutting board let’s get ready 33) the scale and a container brushed with oil, 34) with a pasta cutter we make portions of 300/320 g (to make 4 40×15 trays or if you want 2 40×30 trays)12 PIZZA IN TEGLIA ALLA ROMANA
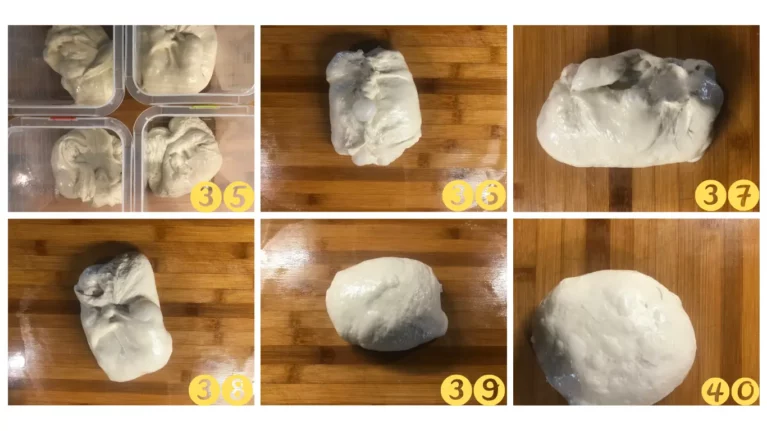
  • Now I show you some photos but I have attached a video where I show the procedure twice, it is more to describe than to see. In other words, put the portion of dough weighed for our pan on the cutting board and then gently fold it around and close the dough. At the bottom of the recipe you can see the video.13 PIZZA IN TEGLIA ALLA ROMANA
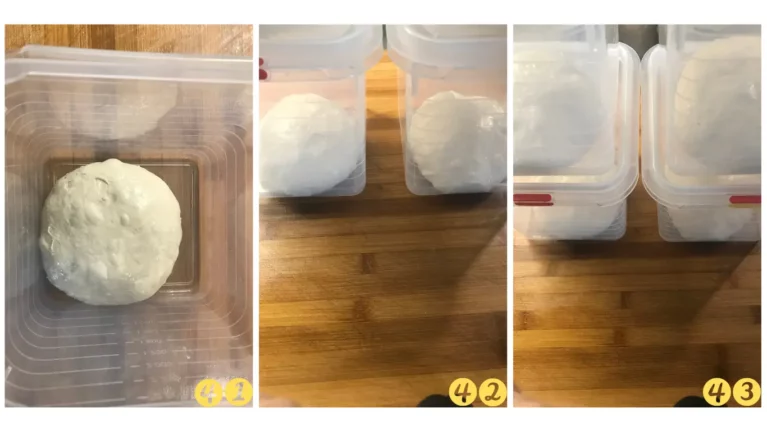
  • At this point we just have to put the loaves in tall, narrow containers to ensure that the gases remain trapped in the dough. This is the last leavening and it can vary from 2 hours to 6 hours, this depends on the temperature we have at home. One piece of advice I want to give you is to mark the initial position on the container with a felt-tip pen and then when doubling or at most tripling the loaves when they are ready to mark the arrival point. These warning signs are used to regulate beyond the pre-established time and adjust by eye to understand when the dough is ready. I hope I was clear, for questions write me.14 PIZZA IN TEGLIA ALLA ROMANA
  • WRITING AND INCLUDING
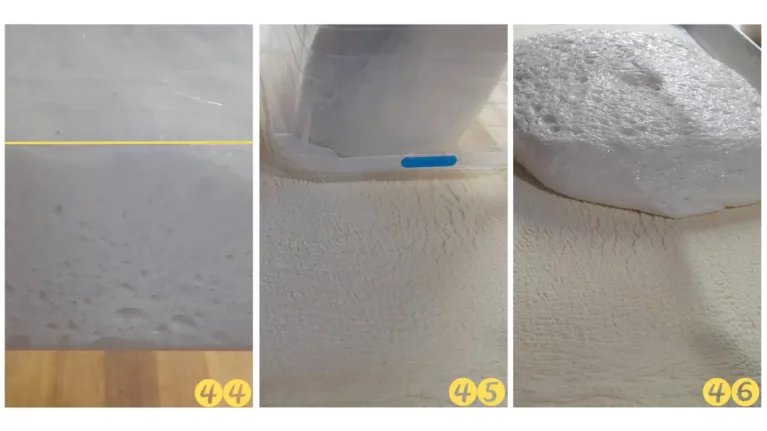
  • After the sizing hours (last leavening) 44) our loaf has increased in volume, 45) turn the container upside down and let it fall out without pulling it to avoid ruining all the work of the yeasts as seen in photo 46)15 pizza in teglia alla romana
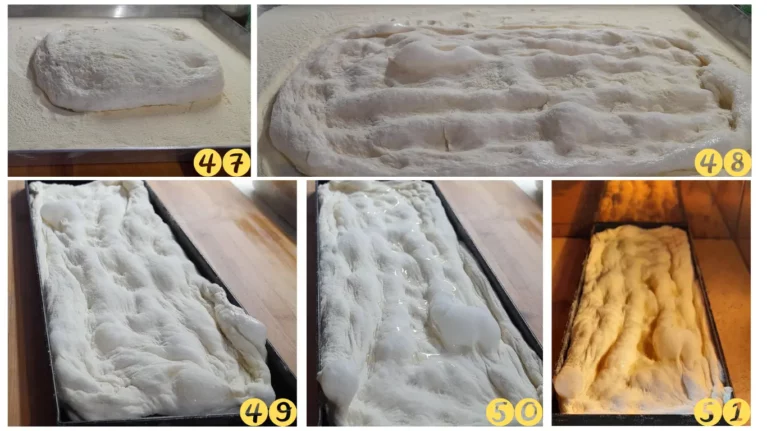
  • Now it’s almost time to cook our Roman-style pizza in a pan, 47) sprinkle the surface with semolina and then 48) press the sides and with the wide fingertips we begin to shape our loaf without stressing it too much. For this operation I attach a video so you can see the steps calmly. 49) Transfer the dough to the pan previously brushed with seed oil and give the last adjustments to our dough and then a drizzle of oil before putting it in the oven 51). 16 pizza in teglia alla romana
  • COOKING
  • We’re now at the finish line, it’s a matter of minutes, in my case I used an EffeUno oven
    Effe Uno model P134HA 509 with the following temperatures Top 250° Floor 350° for 7 minutes.
    Home oven at maximum power (250° if more, better) 8/9 minutes below 7/8 minutes above, times are indicative and dictated by the oven you use.
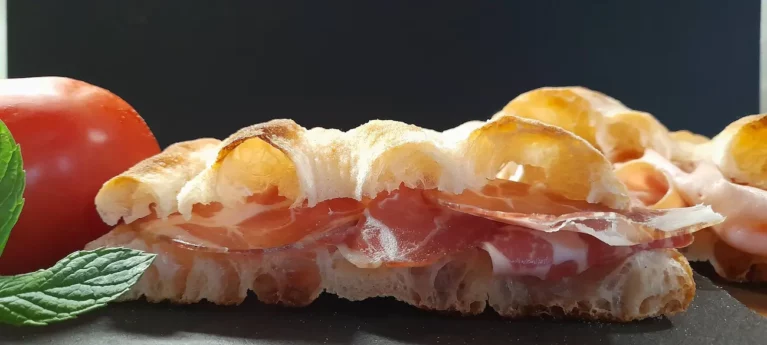
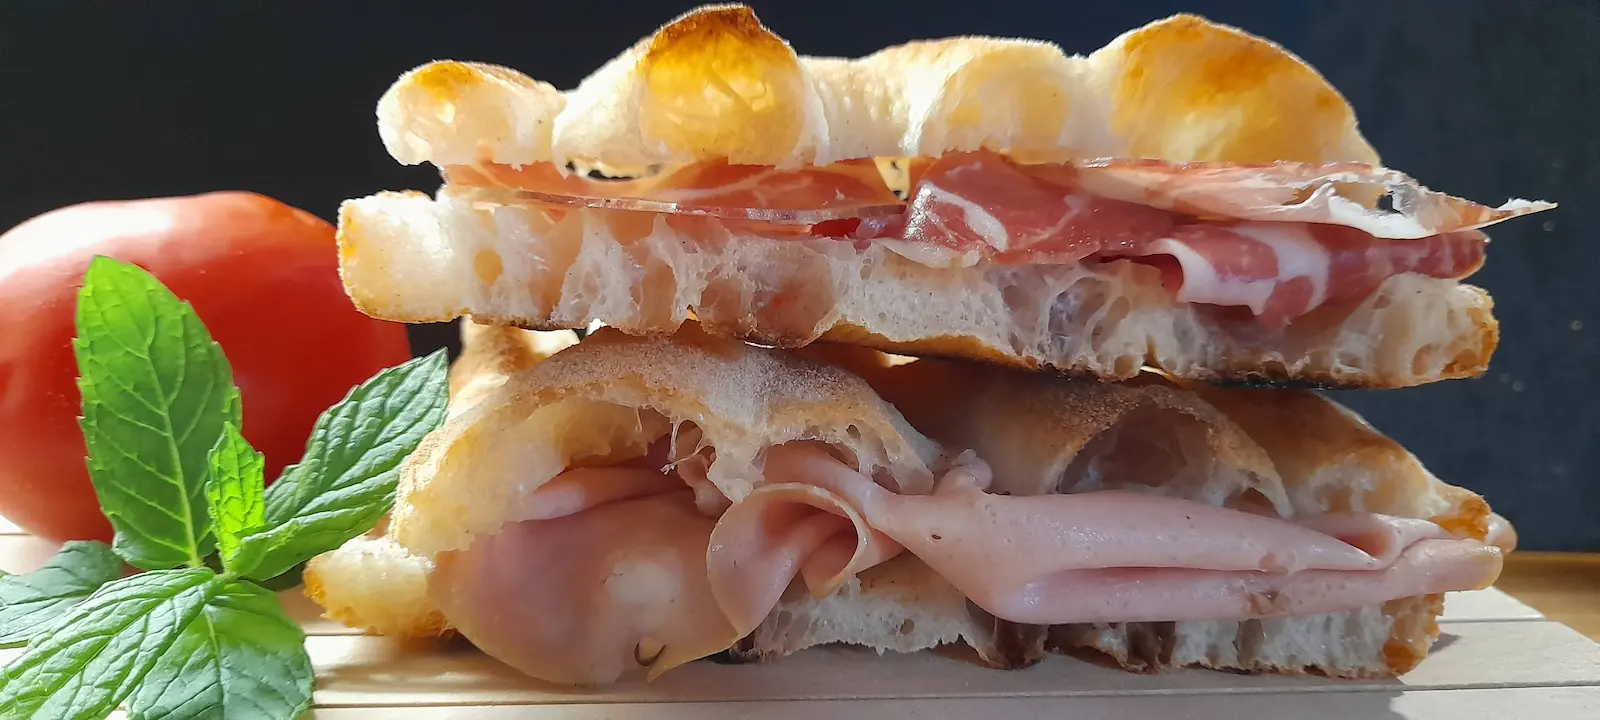
  • Roman pizza can be seasoned in two ways or you split it, you put condiments such as cold cuts, cheeses and etc., or you season the top with products such as vegetables, mozzarella and much more.
    20 pizza in teglia alla romana

Video Ricetta

Note

STORAGE

After letting it rise, you can freeze the pizza dough, preferably portioning it and storing it in freezer bags. Afterwards, just defrost the desired portion at room temperature and continue with the preparation as indicated in the recipe.

Originally posted 2023-05-27 10:59:08.

Tags:

Massimo
Massimo

Sono un appassionato della Pizza e la seguo come il calcio

2 Comments
  1. Thanks for your detailed descriptions. When you dump the dough out of the container into the semolina for a final shaping, do you care which side of the dough ends up facing up or down in the pan? I know the top side of the dough in the container will have the nice smooth surface which might make for a better bottom in the pan for the best crust or it might be prettier for the pizza appearance if facing up. What do you think?

    Leave a reply

    PizzaeFocaccia.it
    Logo